
Table of Contents
- What Makes a Smart Home Safety Device Beginner-Friendly?
- Best Smart Home Security for Beginners: Top-Rated Devices
- DIY Home Security System Setup: A Step-by-Step Guide
- Smart Home Safety Checklist for New Users
- Common Setup Problems and How to Fix Them
- Privacy, Data Storage, and Energy Efficiency
- Frequently Asked Questions
Last Updated: September 13, 2026
What Makes a Smart Home Safety Device Beginner-Friendly?
The best beginner smart home safety devices work out of the box, pair with your phone in minutes, and alert you clearly without false alarms. This Asknik guide breaks down which meet that bar in 2026, and how to set them up without a technician.
Most buyers assume "smart" means complicated. The opposite is usually true: devices that fail beginners need a hub, a subscription, and a manual written for network engineers.
Plug-and-Play vs. Hub-Based Systems
Plug-and-play devices connect directly to your Wi-Fi and phone, nothing else to buy. Unbox, plug in, open the app, and you're running in under ten minutes.
Hub-based systems route every device through a central bridge, adding range and letting devices talk to each other, but also a failure point. If the hub drops offline, everything drops with it.
For a first setup, start plug-and-play. Add a hub later if you outgrow it.
App Simplicity and Notification Settings
A clean mobile app matters more than raw specs. Look for step-by-step pairing and per-device notification settings.
The most common beginner complaint isn't hardware failure, it's alert fatigue. A motion sensor that pings every time a cat walks past gets muted within a week, and then protects nothing.
Best Smart Home Security for Beginners: Top-Rated Devices
Every device below comes from Asknik's curated range, chosen because each installs without tools, a hub, or a subscription. The difference between a device that stays useful for years and one unplugged in a week is rarely the spec sheet.
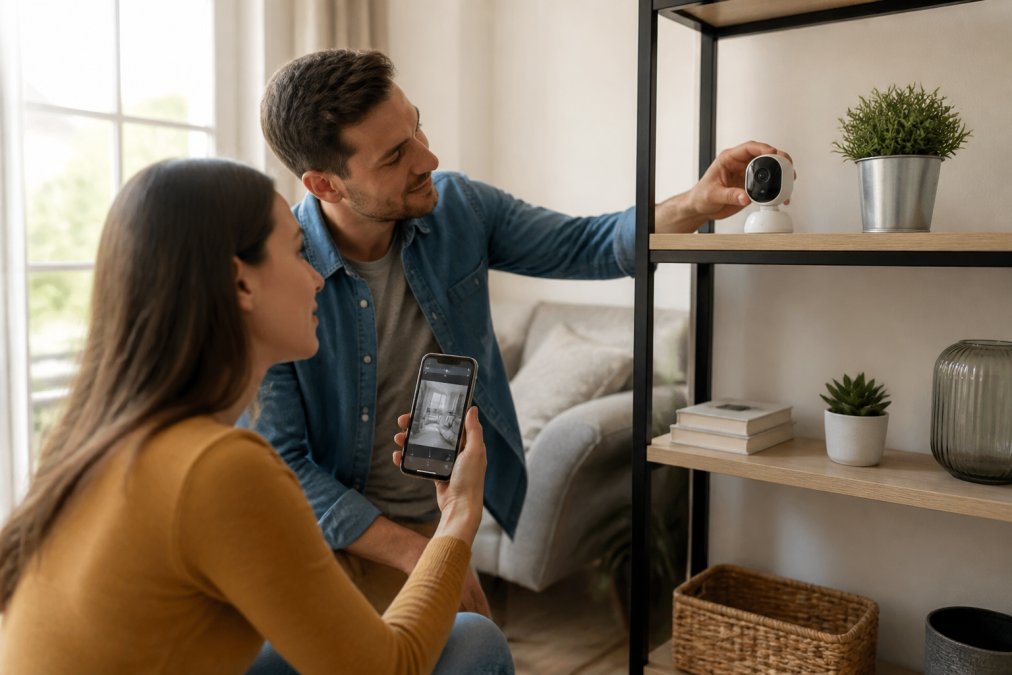
How We Chose These Devices
We filtered for four beginner-first criteria:
- No hub required. The device connects directly to your 2.4GHz Wi-Fi and phone. If it needs a bridge, subscription, or proprietary base station for its core job, it did not make the list.
- Setup under 15 minutes. Unbox, plug in, pair, test. Anything slower fails the beginner test.
- Alerts you can tune. Per-device notification controls, not a single global on/off switch, this prevents alert fatigue.
- Works without an account you don't control. Local storage or offline operation where possible, so a cloud outage doesn't disable your safety net.
That last point matters: a camera that only works when the vendor's servers are up is one you don't fully own.
The Devices at a Glance
| Device | Price | Setup Time | Best For |
|---|---|---|---|
| Wireless Security Camera with Recorder | €46.99 | 10 min | Front door and driveway |
| Smart Motion-Sensor Night Light | €20.99 | 5 min | Hallways and stairs |
| Automatic Choking Rescue Device | €106.99 | Instant | Kitchen and dining areas |
| LED Faucet Thermometer | €28.99 | 2 min | Bathrooms with children |
| Smart Pill Box with Alarm | €62.99 | 5 min | Daily medication routines |
| Portable SafeBox with Code | €56.99 | Instant | Travel and shared spaces |
Wireless Security Camera with Recorder
This is the device most beginners start with, and it's the right call. The Ασύρματη κάμερα ασφαλείας με καταγραφικό records suspicious movement and pushes an immediate alert to your phone.

It records suspicious movement and pushes an immediate alert to your phone. Cloud storage means no SD card to lose.
The honest limitation: cloud clips depend on your Wi-Fi staying up, so fix a weak router first.
Smart Motion-Sensor Night Light
Bathroom trips at 2am cause more falls than most people realise, and a bright overhead light makes you squint. This Αυτόματο LED Ξύλινο Φωτιστικό Νυκτός solves both.
The PIR sensor catches human movement and lights up. The magnetic base sticks to a wall or cabinet and pulls off to recharge, no wiring, no electrician.
For a hallway or stairwell, mount it at knee height rather than eye level: the sensor reads lower-body movement more reliably, and the light lands on the floor where you need it.
Automatic Choking Rescue Device
This one isn't a gadget you'll use often, and that's the point. The Συσκευή Αντιπνιγμού is a CE-certified first aid tool for choking emergencies, built around a single-button mechanism with pre-charging for faster activation.

It ships with three masks covering children and adults.
Where it falls short: it supplements first aid training, not replaces it. Store it in the kitchen, not a cupboard, a device you have to hunt for won't get used in the four minutes that matter.
LED Faucet Thermometer
Scalds in the bathroom are almost entirely preventable, and this is the cheapest fix on the list. The Ψηφιακό Θερμόμετρο Νερού LED screws in between the tap and the hose and shows live water temperature on an LED display.

It's IPX7 waterproof and needs no batteries, water flow powers it. Installation takes about two minutes with no tools.
One caveat: it fits standard threaded taps. If your tap has an integrated aerator or non-standard fitting, check the thread size before ordering.
Smart Pill Box with Alarm
Missed medication is one of the quietest safety risks in any household. The Έξυπνο Κουτί Χαπιών has a built-in timer and alarm that fires at the times you set, with separate compartments per day or dose.
The ABS body is non-toxic and durable, and the rechargeable USB battery means no hunting for button cells. Compact enough for a bag, pocket, or bedside table.
If the person taking the medication has hearing loss, choose a model with a vibration alert or flashing light in addition to the audible alarm. An alarm nobody hears is not a safety device.
Portable SafeBox with Code
Valuables left in a hotel room, gym locker, or car are the easiest things in the world to lose. The Αντικλεπτική Θήκη SafeBox is a coded lockbox in high-strength ABS with EVA shock-absorbing lining.
Internal space runs 20.5 × 10.5 × 4 cm, enough for a phone, wallet, passport, and small devices. It includes a 50cm steel cable for anchoring. No setup, no app, no pairing.
Change the factory code on day one. Most portable safes ship with a default code printed in the manual, anyone who has owned the same model knows it.
Ecosystem Compatibility: What Actually Matters for Beginners
You don't need a full ecosystem to start, just devices that don't fight each other.
- Wi-Fi devices work with any router and any phone, the simplest starting point.
- Matter and Thread are newer cross-brand standards. A Matter-certified device works with Apple Home, Google Home, Amazon Alexa, and Samsung SmartThings without a proprietary hub, so buying Matter-certified now saves replacing devices later.
- Zigbee and Z-Wave need a hub but use less battery and form a range-extending mesh. This is the upgrade path, not the starting point.
Voice assistant compatibility is a nice-to-have, not a requirement. A camera that sends a push notification works with every phone; one that only works with Alexa locks you into one assistant.
DIY Home Security System Setup: A Step-by-Step Guide
A complete DIY home security system setup takes about 30 minutes for three or four devices. The order matters more than the speed.
Step 1: Choose Your Devices and Plan Locations
Pick two or three devices for your first round, not eight. A camera at the main entry, a night light on the bathroom route, and one kitchen safety device covers most of the risk for a typical home.
Walk your home at night with the lights off. The spots that feel wrong are the spots that need a light.
Step 2: Pair Devices with Your Smartphone
Download the manufacturer's app, create an account, and add devices one at a time. Keep each device within a metre of your router for the first pairing, then move it to its final spot.
If a device won't appear in the app, restart your router before the device, in practice, the router is the problem more often than the hardware.
Step 3: Test Alerts and Adjust Notification Settings
Trigger every device manually and confirm the alert reaches your phone within seconds. Then tune each device's notification settings separately.
Turn off alerts you don't need. Keep the ones that matter loud.
Smart Home Safety Checklist for New Users
Run through this smart home safety checklist once after setup, then every three months.
- Every device appears online in its app
- Each device has triggered at least one real test alert
- Notification settings are tuned per device, not globally
- Firmware updates are installed on all devices
- Camera field of view covers the entry, not the neighbour's wall
- Night light triggers within 15 seconds of movement
- Pill box alarm is set to the correct times
- SafeBox code is changed from the factory default
- Wi-Fi password is strong and the router firmware is current
- Two-step verification is on for every device account
Common Setup Problems and How to Fix Them
Most setup failures come down to four causes, none requiring a technician.
Device won't pair. Your router is probably broadcasting on 5GHz only. Most budget smart devices only see 2.4GHz networks. Split your bands or enable a 2.4GHz SSID.
Camera drops offline randomly. Weak signal. Move the camera closer to the router, or add a mesh network node between them.
Alerts arrive late. Latency usually traces back to a congested network or overloaded cloud service. Check whether other devices are saturating your upload bandwidth.
Motion sensor fires constantly. Field of view is too wide or sensitivity too high. Angle it away from windows and heat sources, then reduce sensitivity in the app.
| Problem | Likely Cause | Fix |
|---|---|---|
| Won't pair | 5GHz-only network | Enable 2.4GHz band |
| Camera offline | Weak Wi-Fi signal | Move closer or add mesh node |
| Late alerts | Network congestion | Reduce concurrent uploads |
| False triggers | Wide field of view | Reangle and lower sensitivity |
Privacy, Data Storage, and Energy Efficiency
Privacy is where most beginner guides go quiet, and it's the question worth asking before you buy. This section covers keeping footage in your own home, setting up devices for elderly or disabled family members, and running costs.
Cloud vs. Local Storage: The Real Trade-Off
Cloud storage is convenient and remote-accessible, but your footage lives on someone else's server. Local storage keeps recordings in your home, though you lose access if the device is stolen.
Here is the practical breakdown:
| Storage Type | Pros | Cons | Best For |
|---|---|---|---|
| Cloud | Remote access, no hardware to manage, survives theft | Monthly fee, depends on vendor servers, footage on third-party infrastructure | Driveway and entry cameras you want to check from anywhere |
| Local (SD card or NVR) | No subscription, works during internet outages, footage stays home | Lost if device is stolen, no remote access without extra setup | Interior rooms, hallways, anywhere privacy matters most |
| Hybrid | Cloud for exterior, local for interior | Two systems to manage | Most households after the first month |
A common pattern among privacy-conscious beginners is to run both: cloud for the driveway camera you check from your phone at work, local for interior rooms you want kept off the internet entirely.
Encryption should be non-negotiable. Look for encrypted transmission and encrypted storage, and turn on two-step verification for every device account you create. The UK National Cyber Security Centre guidance on smart device security is a practical starting point for hardening a home network.
Accessibility for Elderly and Disabled Users
Most beginner guides assume a tech-savvy user with full mobility and vision. That assumption leaves out the households that need safety devices most.
If you're setting up for an elderly parent, a family member with limited mobility, or someone with low vision, the priority list changes:
- Motion-triggered lighting beats cameras. A night light on the route to the bathroom prevents falls. A camera records them. The World Health Organization falls prevention guidance makes the case clearly: most falls happen at home, and most are preventable with lighting and layout changes.
- Audible and tactile alerts beat app notifications. A pill box with a loud alarm or vibration alert works for someone who doesn't check a phone. An app notification nobody hears protects nobody.
- Physical controls beat app-only controls. A device with a physical button is usable by someone who finds touchscreens difficult. The choking rescue device is a good example, one button, no app, no pairing.
- Large-text and high-contrast apps matter. If the person using the device has low vision, check that the app supports larger text sizes before you buy. Many do not.
- Voice control can replace app navigation. If the household already uses Alexa, Google, or Siri, choose devices that work with that assistant so the user can say "turn on the hallway light" instead of opening an app.
A simple accessibility-first starter kit: one motion-sensor night light on the bathroom route, one smart pill box with an audible alarm, and one choking rescue device in the kitchen. No camera, no subscription, under 15 minutes to set up.
What These Devices Actually Cost to Run
Energy efficiency is the other quiet win, and the math is simple.
- A 1W night light running six hours a day draws about 2.2 kWh per year, a few euros annually at typical European rates, less than a replacement bulb.
- A Wi-Fi security camera running 24/7 draws roughly 3 to 5W, or 26 to 44 kWh a year, about the cost of one streaming subscription.
- Motion-triggered devices cut consumption further: a sensor that only wakes on movement can draw under 0.5W in standby.
None of these devices will noticeably move your utility bill. Bigger savings come from smart thermostats and smart plugs, worth considering once your safety devices are running.
The European Commission guidance on CE marking explains what a CE mark actually certifies, which is worth reading before you trust any safety claim on a product page. A CE mark confirms the product meets EU health, safety, and environmental requirements. It does not certify that the app is secure or that the vendor will keep supporting the device.
Frequently Asked Questions
What is the easiest home security system to set up for beginners?
The easiest systems are plug-and-play devices that connect directly to your Wi-Fi and require no hub. A wireless security camera like the one from Asknik (€46.99) pairs with your phone in minutes, sends real-time alerts, and needs only a power outlet. Look for app-guided setup, QR code pairing, and no wiring. Avoid systems that demand drilling or professional installation unless you want permanent mounting.
Do I need professional installation for smart home safety devices?
No. Most beginner-friendly smart safety devices are designed for DIY setup. Plug-and-play cameras, motion-sensor lights, and smart pill boxes work right out of the box. Only hardwired systems or whole-home security networks typically require a professional. If you can follow a step-by-step app tutorial, you can install these devices yourself and save on installation fees.
Are DIY smart home security systems reliable?
Yes, when you choose devices with stable Wi-Fi connectivity and local or cloud backup. Reliability depends on your network strength and device quality. A camera with 1080P resolution and IR night vision, like Asknik's wireless model, provides clear footage and motion alerts. Test your system monthly, keep firmware updated, and ensure your Wi-Fi covers all device locations.
What should I include in a smart home safety checklist for beginners?
Start with a Wi-Fi security camera for entry points, a motion-sensor night light for hallways, and a smart pill box if anyone takes daily medication. Add a choking rescue device for families with young children or elderly members. Check that all devices connect to your phone, set up real-time alerts, and test notifications. Review privacy settings and enable encryption where available.