


Set Up a Smart Pet Monitoring System: 7 Steps

Table of Contents
- What You'll Need Before Starting
- Step 1: Choose the Right Pet Camera Setup
- Step 2: Find the Best Camera Placement for Pets
- Step 3: Install Your Camera and Connect to Wi-Fi
- Step 4: Set Up the Mobile App and Configure Alerts
- Step 5: How to Set Up an Automatic Pet Feeder
- Step 6: Introducing a Dog to a Pet Camera
- Network Security and Privacy for Your Monitoring System
- Frequently Asked Questions
Last Updated: October 17, 2026
What You'll Need Before Starting
Setting up a smart pet monitoring system at home requires just a few essentials.
The beauty of a smart pet monitoring system is that most setups work independently. You don't need professional installation or technical expertise. Many pet owners worry about complexity, but modern systems are designed for everyday users, not IT specialists.
Here's what to consider before purchasing:
- Wi-Fi strength in the room where your pet spends most time
- Power source availability near your desired camera location
- Budget for initial equipment and any cloud storage subscriptions
- Pet size and behavior (this affects camera placement and feeder type)
- Your smartphone compatibility with the app
At Asknik, we help customers find the right combination of monitoring tools that fit their lifestyle. Start by identifying your biggest concern: Is it keeping an eye on your pet while you're away? Monitoring feeding times? Tracking your pet's location?
Step 1: Choose the Right Pet Camera Setup
The right pet camera depends on what you want to monitor. A basic pet camera with motion detection and live streaming handles most situations. More advanced models add night vision, two-way audio, and automatic tracking.
Start with these questions:
- Do you need to hear and speak to your pet remotely?
- Is night vision important for your home layout?
- Do you want motion alerts sent to your phone instantly?
- Will you use cloud storage or prefer local storage on an SD card?
The Asknik-recommended Ασύρματη Κάμερα Ασφαλείας 1080P με Ειδοποιήσεις στο Κινητό delivers full HD video at 1080P resolution with motion detection built in.

Consider your specific use case:
- Single pet in one room → Basic 1080P camera with motion detection
- Multiple pets or larger space → Two cameras with overlapping coverage
- Night monitoring → Ensure low-light capability is included
- Away from home frequently → Prioritize cloud storage options
The camera's field of view matters too. A 3.6mm lens provides a standard viewing angle suitable for most rooms. Test the coverage before finalizing placement.
Step 2: Find the Best Camera Placement for Pets
Camera placement determines whether your pet monitoring system actually works. The best camera placement for pets balances visibility with safety. Mount the camera at or slightly above your pet's eye level.
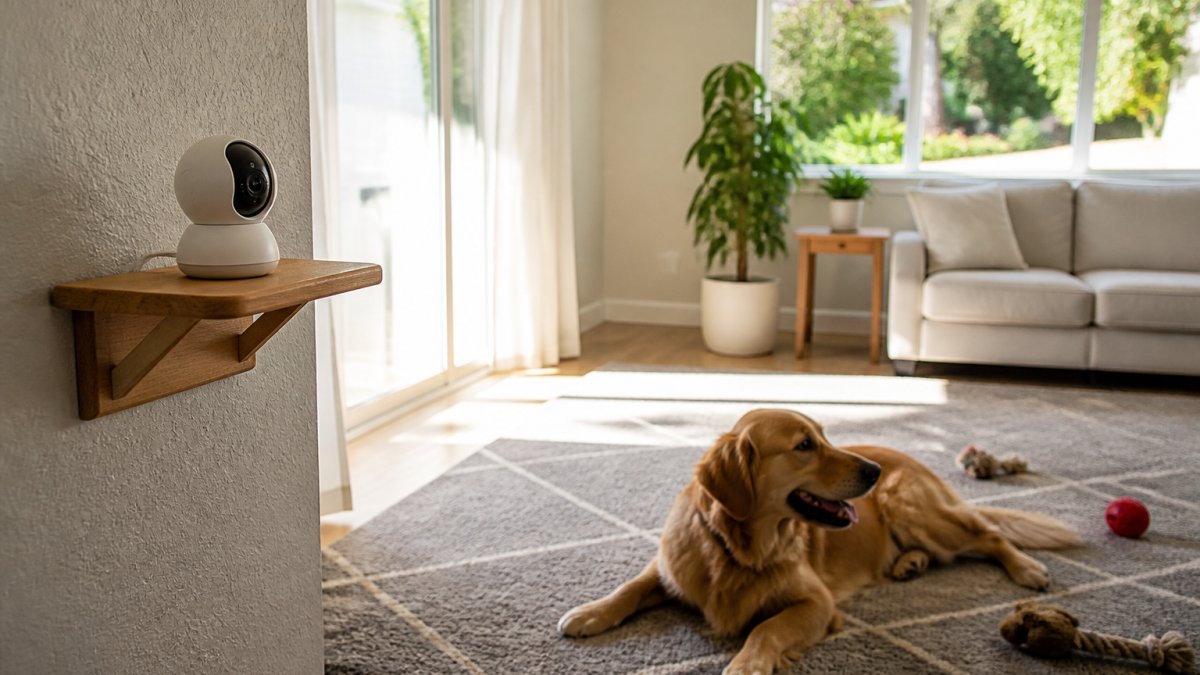
Avoid these common placement mistakes:
- Mounting too high → You see the top of your pet's head, not their face or actions
- Pointing at windows → Backlighting ruins video quality and wastes bandwidth
- Placing near heat sources → Direct sunlight or heating vents can damage the camera
- Blocking the camera with furniture → Even small obstacles create blind spots
- Mounting in high-traffic human areas → Your pet avoids the monitored zone
The ideal location lets you see your pet's favorite resting spot, eating area, and play zone. If your pet spends time in multiple rooms, consider multiple cameras rather than moving one camera around.
For apartment living or rental situations, use removable mounting solutions. Command strips and magnetic mounts work well without damaging walls. Test the Wi-Fi signal strength at your chosen location before installation.
Step 3: Install Your Camera and Connect to Wi-Fi
Installation takes about 10 minutes for most users. Start by finding a stable mounting surface at your chosen location. Use the included bracket or adhesive mount, follow the manufacturer's instructions for your specific model.
Next, connect the camera to power. Use the provided 5V adapter and plug into a nearby outlet. The camera will power on and begin initialization. Wait 30-60 seconds for the startup sequence to complete.
Now for the Wi-Fi connection:
- Download the companion app to your smartphone
- Open the app and select "Add Device" or "Pair Camera"
- Scan the QR code on the camera or enter the device ID manually
- Select your home Wi-Fi network from the available list
- Enter your Wi-Fi password
- Wait for the connection to establish (usually 1-2 minutes)
- Test the live video feed
If connection fails, check these items:
- Wi-Fi password is correct (case-sensitive)
- Your phone is on the same Wi-Fi network as the camera
- Router is within 20-30 feet of the camera
- No physical barriers between camera and router
- Your Wi-Fi network supports 2.4GHz (most cameras require this, not 5GHz)
A strong Wi-Fi connection is non-negotiable for a reliable smart pet monitoring system. If your Wi-Fi is weak in the target room, move your router closer or add a Wi-Fi extender before installing the camera.
Step 4: Set Up the Mobile App and Configure Alerts
Once your camera connects, the real customization begins. Open the mobile app and navigate to camera settings. You'll see options for motion detection, alert notifications, and recording preferences.
Configure motion detection first:
- Sensitivity level → Start at medium; adjust if you get too many false alerts from shadows or ceiling fans
- Detection zone → Some apps let you select specific areas to monitor, ignoring others
- Alert delay → Set a few seconds to filter out momentary movements
- Quiet hours → Disable notifications during times you know your pet will move around normally
Next, enable activity alerts:
- Choose which activities trigger notifications (motion, sound, person detection)
- Select how you want to be alerted (push notification, email, or both)
- Test the alert system by walking in front of the camera
- Verify you receive the notification on your phone
For cloud storage, review the options:
Ασύρματη Κάμερα Ασφαλείας 1080P με Ειδοποιήσεις στο Κινητό →
- Local storage on SD card → No monthly fee, but limited by card capacity
- Cloud subscription → Ongoing cost but unlimited history and backup
- Free cloud tier → Usually 24-48 hours of rolling storage
Most users start with local storage on an SD card. Upgrade to cloud if you need longer video retention or access from multiple devices.
Step 5: How to Set Up an Automatic Pet Feeder
An automatic pet feeder pairs perfectly with your camera system. You can watch your pet eat and control feeding times remotely. The Αυτόματη Ταΐστρα και Ποτίστρα Κατοικιδίων με Σύστημα Βαρύτητας uses gravity-based dispensing, so no batteries or power are required.

This feeder works differently than electronic models. Food and water flow down into the bowl as your pet eats and drinks. The system maintains consistent portions throughout the day without programming.
Setting up the gravity feeder:
- Choose a location on a flat, washable surface (kitchen or dining area)
- Fill the upper reservoir with your pet's regular food
- Fill the water chamber with fresh water
- Let your pet approach and investigate the new feeder
- Monitor the first few meals to ensure your pet adapts
The gravity system works best for pets that eat at a steady pace.
For pets requiring portion control:
Step 6: Introducing a Dog to a Pet Camera
Introducing a dog to a pet camera requires patience and positive association. Dogs notice new objects in their environment. The goal is making the camera feel normal, not threatening.
Start the introduction process:
- Place the camera in the room but don't turn it on yet
- Let your dog investigate naturally for 2-3 days
- Reward your dog with treats when they approach the camera
- Once comfortable, power on the camera (no alerts yet)
- Continue treating your dog for calm behavior near the camera
- Gradually enable motion detection and alerts
Most dogs adapt within one week. Some may take two weeks. Never force interaction. If your dog shows fear, move the camera further away and extend the introduction timeline.
Watch for these signs your dog has adjusted:
- Ignores the camera completely
- Passes by without hesitation
- Shows no stress or anxiety
- Maintains normal eating and sleeping patterns
Avoid these mistakes during introduction:
- Sudden loud noises or alerts that startle your dog
- Pointing the camera directly at your dog's face
- Enabling two-way audio immediately (the speaker can frighten dogs)
- Changing the camera position frequently
Once your dog accepts the camera, you can enable two-way audio for training or comfort. Use a calm, familiar voice when speaking through the camera.
Network Security and Privacy for Your Monitoring System
A smart pet monitoring system connects to your home network. This means security and privacy deserve serious attention. Your camera streams video and audio, so protecting that data matters.
Follow these security steps:
- Change default passwords → The camera comes with a default password. Change it immediately to something unique and strong.
- Enable two-factor authentication → If the app offers it, activate this feature for your account.
- Update firmware regularly → Manufacturers release security patches. Check for updates monthly.
- Use a strong Wi-Fi password → Your network password should be 12+ characters with mixed case, numbers, and symbols.
- Enable WPA3 encryption → This is the latest Wi-Fi security standard. Check your router settings.
Consider privacy in your setup:
- Disable cloud storage if you don't need it → Fewer copies of video mean less exposure.
- Review app permissions → Does the app really need access to your photos or contacts? Disable unnecessary permissions.
- Check who has access → Limit app access to family members only. Avoid sharing login credentials.
- Use local storage when possible → SD cards store data on your device, not in the cloud.
Network reliability also affects your monitoring system. A dropped connection means you lose live view access. Strengthen your network:
- Position your router centrally in your home
- Keep the camera within 30 feet of the router
- Minimize obstacles between router and camera
- Consider a Wi-Fi extender if coverage is weak
- Restart your router monthly for optimal performance
A properly configured smart pet monitoring system gives you peace of mind. You watch your pet in real-time, receive instant alerts, and maintain control over feeding schedules, all from your smartphone. The setup process is straightforward when you follow these steps in order.
Setting up a smart pet monitoring system puts your pet's safety and wellbeing in your hands. Asknik offers everything you need to get started, from the Ασύρματη Κάμερα Ασφαλείας 1080P με Ειδοποιήσεις στο Κινητό for live streaming and motion alerts to the Αυτόματη Ταΐστρα και Ποτίστρα Κατοικιδίων for scheduled feeding. We also carry pet tracking collars like the Δερμάτινο Περιλαίμιο Σκύλου με Θήκη για AirTag to monitor your pet's location when they're outside.

Frequently Asked Questions
Can a smart pet camera send motion or sound alerts?
Yes. Most smart pet monitoring systems detect motion and sound, then send notifications to your phone through the companion app. The Ασύρματη Κάμερα Ασφαλείας 1080P, for example, records motion and sends alerts via mobile app. You can customize alert sensitivity to reduce false alarms from shadows or moving curtains, and set quiet hours so you're not constantly notified.
Where should I place a pet camera at home?
Position your pet camera at your pet's eye level or slightly above, 1-2 metres away from where they spend most time. Avoid backlighting from windows, which washes out the image. Mount it on a stable shelf or wall bracket away from cords and objects your pet could knock over. Test the Wi-Fi signal strength at that spot before permanent installation.
How do I introduce a dog to a pet camera?
Start by placing the camera in the room without turning it on. Let your dog investigate and sniff it. Once they're comfortable, activate the camera and spend time nearby so they associate it with normal activity. Use treats and praise to create positive associations. Avoid sudden movements or loud noises near the camera that might startle them. Most dogs adjust within a few days.
What's the difference between cloud storage and local storage for pet monitoring?
Cloud storage uploads video to remote servers, letting you access footage from anywhere but requiring a subscription and ongoing internet connection. Local storage saves video to an SD card in the camera, giving you privacy and no monthly fees but limiting access to when you're home or on your local network. Many systems offer both options, choose based on your privacy concerns and budget.